The Dual-Screen Pinebook Pro
In this project, I’ll turn my Pinebook Pro into a portable multi-monitor Linux laptop and show you how to do the same.
Introduction
In this post, I’ll share how I turned my Pinebook Pro into a dual-screen Linux laptop. It’s a rather inexpensive upgrade, and what parts I didn’t personally have on hand I was able to manufacture myself.
This post is not meant to be an exhaustive guide. I simply want to put the bug in your ear and show you how I did it, confirming that a dual-screen setup for the Pinebook Pro is not only possible, but entirely functional (and looks slick too).
It’d be nice to have a portable multi-monitor workstation. And that’s where this project comes in.
A Quick Disclaimer
I can’t promise this will work as well on every Linux distro, nor can I assure you every USB-C screen will work. So I’ll say this: The Pinebook Pro is a laptop for makers. Projects like this may or may not work, and may take troubleshooting and time to figure out. There are so many variables. But to me, the process is all part of the fun, and the risk is thrilling.
Keep in mind as you dive into this project that drawing too much power from your Pinebook Pro could cause problems, or even damage. While I’ll cover my power requirements below, it’s important to note that you do this at your own risk. If in doubt, speak with someone who is confident about this stuff, or post your questions in the forum to request help from the community.
Don’t miss the video at the bottom of this post!
My Dual-Screen Pinebook Pro
_Mmmmmmm_ulti-Monitors
As a coder, I love multi-monitor setups. It’s not unlike me to have my IDE up on one screen and a test environment on another. Or, when working on graphics, I prefer to move the GIMP tools to one screen and the image to another, maximizing the visible canvas. When producing my videos, multiple monitors is an absolute requirement.
Good luck fitting my usual multi-monitor setup in a carrying bag!
My Distro
I’m not suggesting you install the same distro as me, but if you do have trouble getting up and running on your version of Linux, it might help to know that I am running a custom-compiled Debian 11 on my Pinebook Pro, pretty much stock. You can learn how I did that here: https://www.youtube.com/watch?v=8WSqcmuJjCM
Selecting My Display
The project began with selecting which external display I would buy. You can choose whichever screen you like, but for reference, here is the criteria I had for my display selection:
- Minimized Connectivity Requirements - A single USB-C cable from the Pinebook Pro to the screen should provide both video and power to the monitor. As noted by Tobias Mädel on our YouTube video about the project (below), the USB-C mode we’re looking for is called “DisplayPort Alternative Mode”, or DP-Alt-Mode,
- Matching Aesthetic - The color and physical dimensions of the screen should closely resemble those of the Pinebook Pro’s screen,
- Portable - It should fold down flat, making it easy to transport both the Pinebook Pro and the external screen in the same laptop bag without excessive bulk,
- Application Dimensions Match - A 16:9 aspect ratio and resolution that matches that of the Pinebook Pro screen (1920x1080) so dragging windows from one screen to the other does not result in perceptual shifting in window size,
- Highly Affordable - Price of the external display should be less than that of the Pinebook Pro itself.
You can spend more if you like. I wanted the additional challenge of seeing if an ultra-affordable display would work. They can be hard to come by under ~$160, but I was fortunate to find one for just $100 USD … which promptly sold out at that price and is no longer available (sorry). As my criteria is brand agnostic, you shouldn’t have any trouble finding something similar. Just be particularly mindful that your power requirements may differ from mine.
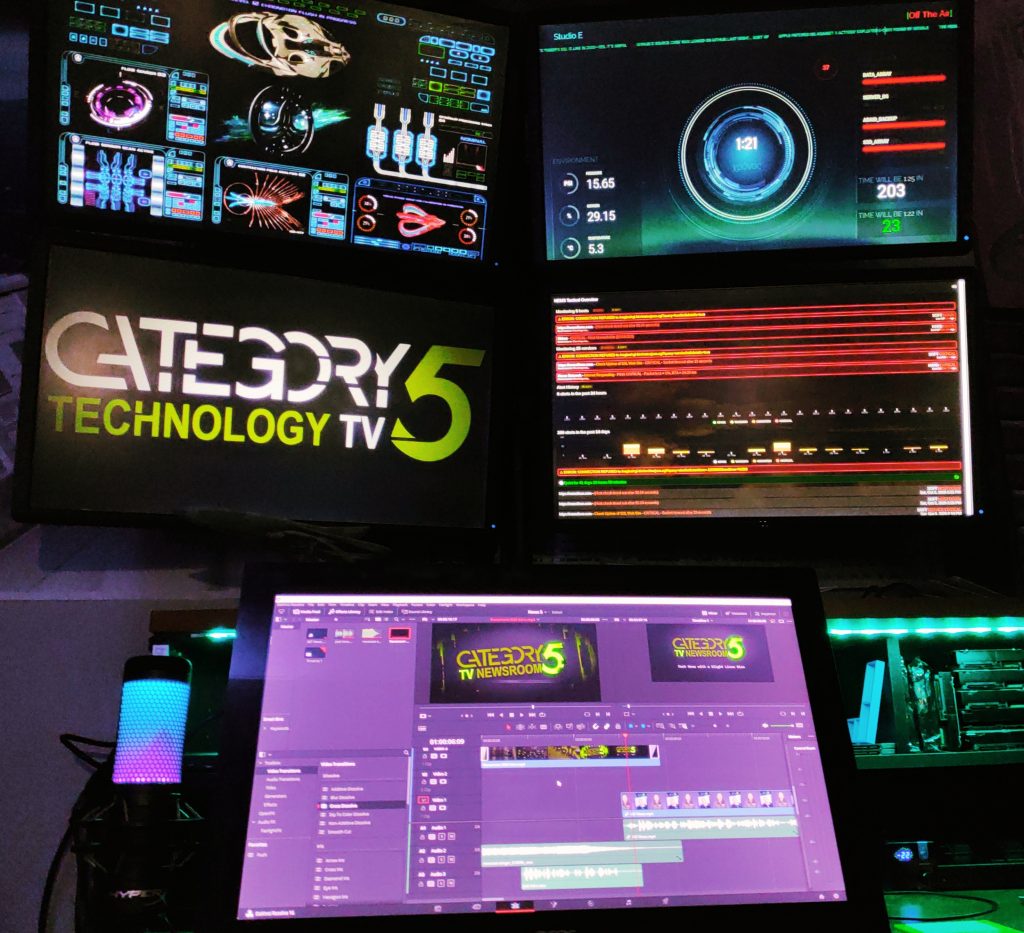
My production workspace on “The Bridge” at Category5 Technology TV. Yes, I enjoy multi-monitor setups.
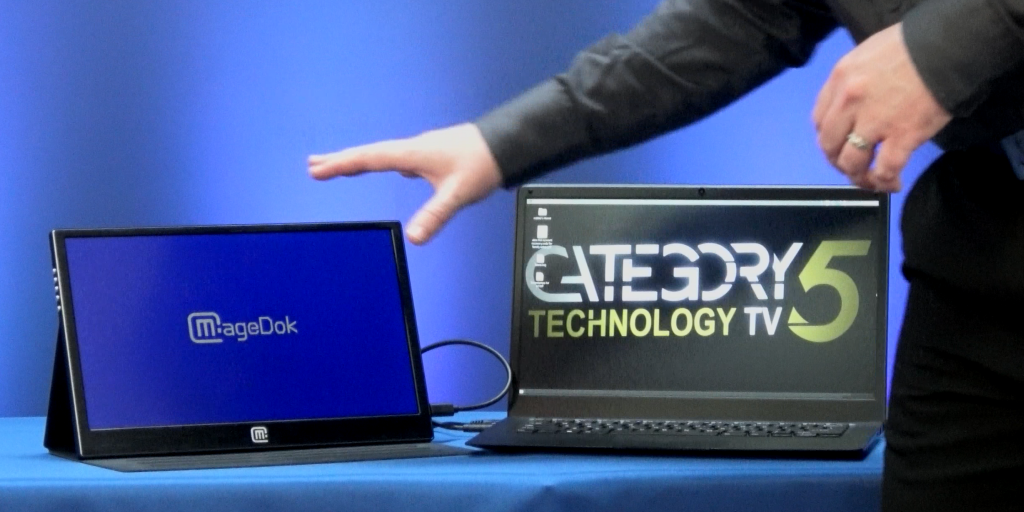
Connecting The Display
Out of the box, I connected the external display to the Pinebook Pro via a single USB-C to USB-C cable which came provided with the monitor. The screen powered on showing the vendor logo, but then displayed “No Signal” and eventually went to sleep.
I opened the Display settings on the Pinebook Pro, and it didn’t even detect the second screen. I tried the quick and obvious: Reboot the Pinebook Pro while the display was connected. It still didn’t detect.
I didn’t want to dig too deep into the system right away, just in case my issue was a simple one that had already been dealt with. So I got onto the PINE64 Community Forum and sure enough, I quickly found a thread mentioning a similar issue. DrYak posted a reply last June suggesting the user simply unplug the USB-C cable, turn it over, and plug it back in.
Wait a minute - I thought USB-C did away with the old Superposition feature of USB-A!
But … It worked! To my surprise and delight, the display powered on as before, but this time, my Pinebook Pro display flashed, and my desktop suddenly and instantly extended itself to the external display.
When first connected, the display didn’t do anything more than this, but DrYak’s suggestion worked.
A Note About Screen Orientation
When you first connect your external display, your Pinebook Pro has no way of knowing whether you’ve placed it physically on the left or right of the built-in screen, so you may need to adjust the screen position within your Display settings. Simply drag the monitors to the correct orientation and apply the changes.
Power Requirements
The DC power supply for the Pinebook Pro is 5V 3A, so I’ll use that as my baseline. Of course, PINE64 left some room for connected peripherals, NVMe, and so-on, but it’s unlikely they intended users to power an external display.
Along that vein, I don’t suggest running your dual-screen setup from the Pinebook Pro’s battery. Doing so could damage the battery or other components of your Pinebook Pro.
The monitor you buy may be different than mine, so be sure to look at the power requirements in the documentation provided by the manufacturer. In the case of the one I purchased, the power requirements are listed as 5V 8W. The formula to find Amps is an easy one. Simplified, it is Watts / Volts = Amps. So 8 divided by 5 in my case, which gives me 1.6 Amps.
Based on the 3A baseline for the Pinebook Pro and the 1.6A required by my display, I can see that I will want a minimum of 4.6A to power the two together. So I’ll round up and opt for a 5V 5A power supply.
Power Supply Peripherals
Here are some examples of what you might want to use to get you up and running with a single 5A power supply. The DC power supply goes to an adapter, and that goes to a USB cable that has the proper barrel connection for the Pinebook Pro on the other end. This will provide more than enough current not only for the Pinebook Pro, but the external screen as well.
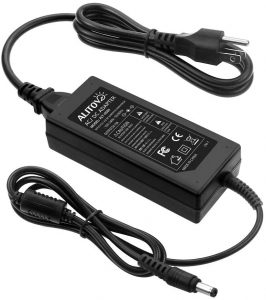
5V 5A DC Adapter

DC 5V USB-A Male to 3.5mm x 1.35mm Barrel Plug Cable

Adapter to Connect The Two
(Make Sure the Barrel Jack Matches Your AC Adapter)
In my case, I already have the 5V 5A DC power supply on hand (a spare for LED lights), and I bought the USB to barrel plug previously for my Pinebook Pro to power it from a wall wart. But I don’t have one of those fancy adapters on hand to connect them together. Plus, I don’t really want to wait for one to arrive in the mail. So, I’ll instead fire up my 3D printer and have some extra fun!

Getting Started: Slicing my quick and simple design.
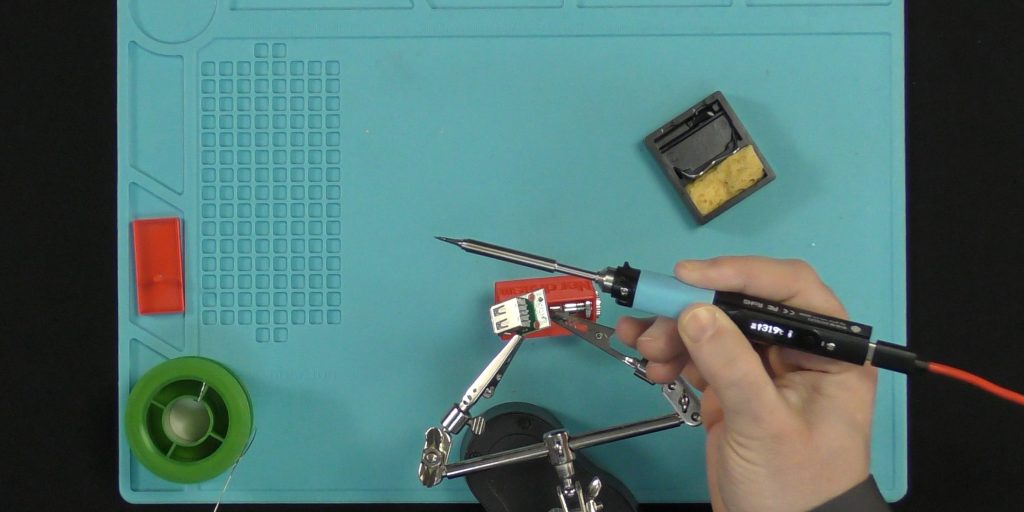
Soldering A Custom Adapter: Using my Pinecil for the first time to create my own 3D-printed Barrel to USB adapter.
After this simple project, I officially LOVE the Pinecil!
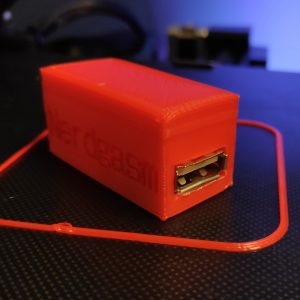
The Final Result: Not as sleek as store bought, but it works, and is something I can be proud of.
Of course, you can just buy the adapter if you’re not as nerdy as me. Granted, if you want to take a crack at it, you can download my simple design here.
Putting It All Together
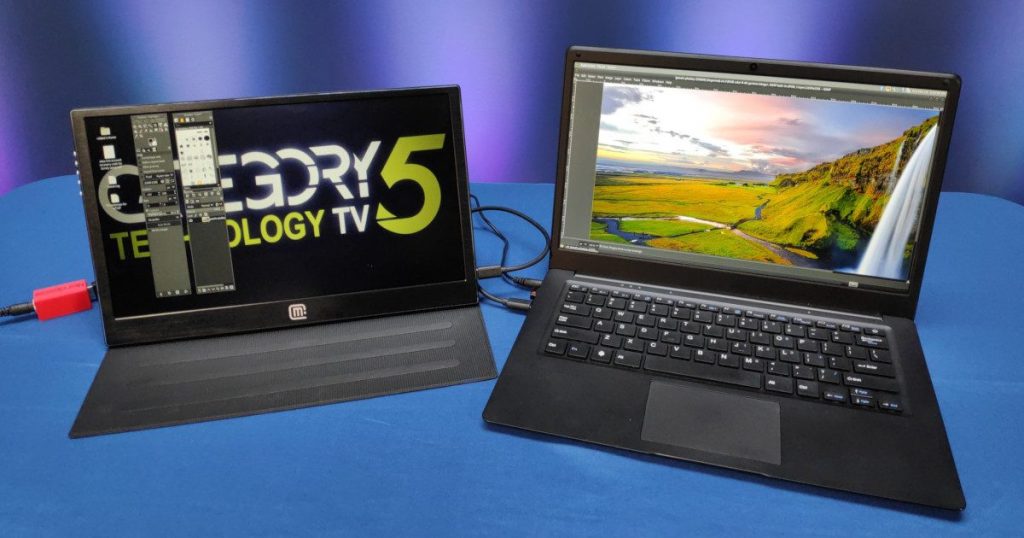
By matching up my choice of monitor so closely to that of the Pinebook Pro built-in display, I get a strikingly seamless multi-monitor experience from my dual-screen Pinebook Pro. Because my custom power supply is allows me to increase the brightness of the external display, I’m able to very closely match the brightness and color as well.
I now have a gorgeous dual-screen Pinebook Pro, ideal for coding, photo manipulation and design, working online through the browser, or even remotely connecting to my powerful video editor to work from home.
Is It Really That Easy?
Your experience may vary, but for me, it really was that simple to get up and going! I hope it works for you too.
The Pinebook Pro is a fantastic Linux Laptop for those of us who love to tinker. Don’t fret if you have trouble. The community is here to help, and I’m confident that with some patience and tinkering, you’ll get there too.
Watch The Video
There’s nothing quite like seeing it in action. Please give my short video a watch to see how I devised the project, and learn even more about my custom Pinebook Pro power supply hack. I’d also be grateful if you’d consider giving it a “thumbs up” on YouTube.
https://www.youtube.com/watch?v=NOA6hWiXfAo
Further Improvements
The next practical step for me is to simply tie-wrap the USB-C cable to the Pinebook Pro’s power cable, giving the appearance that it’s just one cable, making it look even neater. It would be fun to design and 3D print a connector to actually mount the second display to the Pinebook Pro and hide that single USB-C cable entirely within by soldering a ribbon cable directly between the two in place of the USB-C. Oh, the options are truly endless with a hackable device like the Pinebook Pro.
Conclusion
I’m really happy with this setup. I reminisce about those pre-pandemic days when I could sit in my local coffee shop all afternoon with my Pinebook Pro and do my work over WiFi. I’m excited for the time to come when I can do that again, but this time I’ll pull out the second screen and look entirely 1337 as I sip my latte.
If you end up trying the dual-screen Pinebook Pro setup, I’d love to read your comments below!
Thanks for reading, and remember, if you’re not having fun, you’re doing it wrong.

About The Author
Robbie Ferguson is the host of Category5 Technology TV. He enjoys creating fun but approachable tech projects that can be accomplished by people with varying levels of skill and experience.
Subscribe to his YouTube channel for more content.
Estimated reading time: 9 minutes (1868 words)
Related posts:
- March Update: Status Report
- February Update: Show and Tell
- January Update: Happy New Gear!
- December Update: The Longest One Yet
- November Update: KDE PinePhone CE And A Peek Into The Future